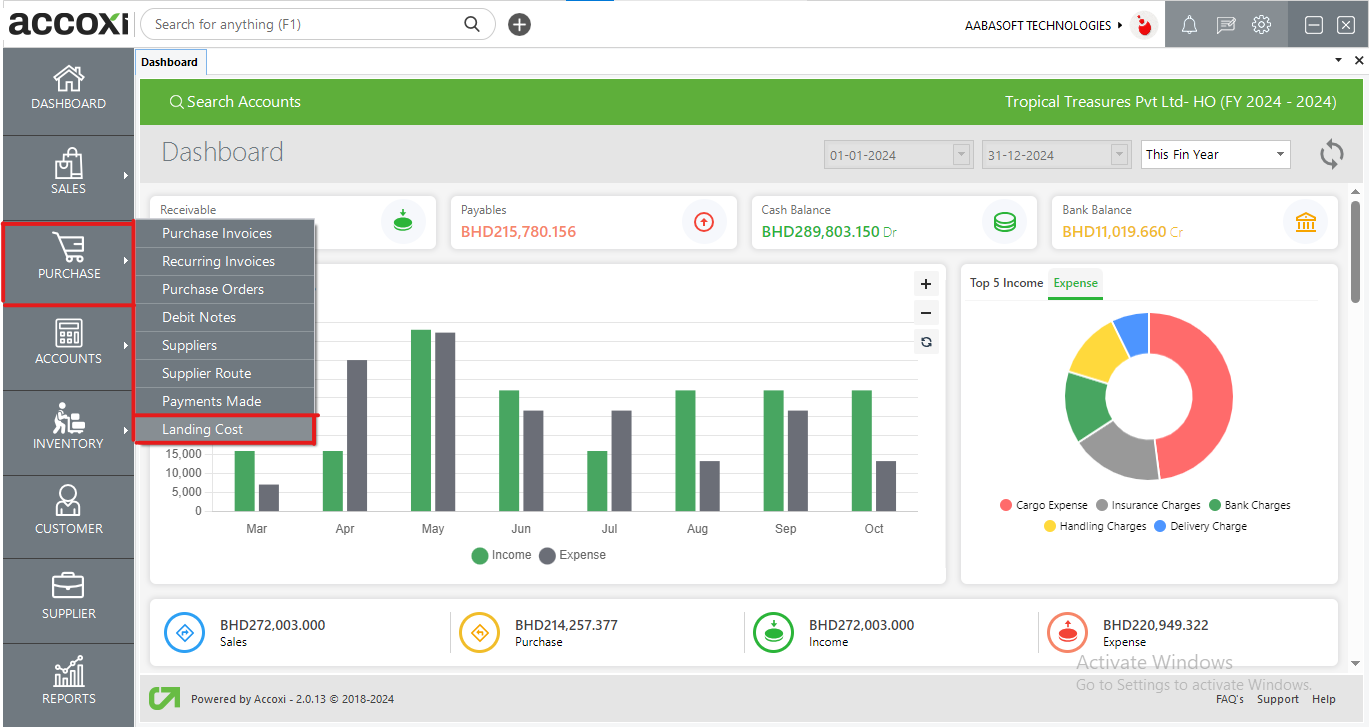
Landing Cost
The "landing cost" refers to the total expenses incurred when acquiring goods or products from a supplier and bringing them to their final destination or point of use. This comprehensive cost encompasses not only the purchase price of the items but also additional expenses such as transportation fees, customs duties, taxes, handling charges, and any other relevant costs associated with the procurement and delivery process. Calculating the landing cost provides a more accurate reflection of the total investment required to obtain the goods, enabling businesses to make informed decisions regarding pricing, inventory management, and overall financial strategy.
How can I allocate landed cost in Accoxi?
Landed cost of a product is the total cost involved in bringing a product to the buyer’s warehouse apart from the cost of goods. This is usually the freight, shipping charges, customs and other charges that the buyer may incur till he procures the goods.
Tracking the landed cost helps determine the overall cost incurred in procuring the product. This, in turn, helps you to decide the selling price for your stock without compromising your profits.
In Accoxi, you have the flexibility to mention the expenditure on each item along with the additional cost of purchase. You will be able to assess the exact selling price or value of a stock item that includes the additional purchase cost.
Various scenarios may incur additional costs, and Accoxi is adept at managing them. Let's delve into how Accoxi adeptly handles these diverse situations.
Managing Landing Costs in Same Supplier Transactions
"Managing Landing Costs in Supplier Transactions" refers to the process of handling additional expenses incurred with the same supplier from whom goods are purchased. This entails the supplier charging the buyer for any additional costs accrued until the product reaches the buyer's warehouse.
Step by Step Process
Step 1: Create a new ledger for the expense incurred from the ledger option within the Accounts module.
Account Group: Choose "Direct Expense" or "Indirect Expense" based on the nature of the expense.
Ledger Name: Name of the expense incurred.
Step 2: Navigate to the Purchase Module and choose the Purchase Invoice option.
Step 3: Click on the "+New Purchase Invoice" button to open the purchase creation window.
Step 4: Fill in all necessary transaction details.
Step 5: Enter the purchased product and relevant product details in the product/service grid.
Step 6: In the product/service grid, select the appropriate expense account to be allocate, and input the expense amount and applicable tax rate if needed.
Step 7: Once all details are entered, click the save button to proceed with the transaction.
Step 8: Access more features in the Purchase Invoice view screen and select the "Allocate Landing Cost" option.
Step 9: A pop-up window named Landing Cost Details will appear, presenting the expense details filled from the created purchase invoice.
Step 10: Click on the "Allocate Landing Cost" icon available in the screen, which will open the Landing Cost Allocation window for allocating the expense amount to the items in the purchase invoice.
Step 11: The allocation of landing costs to the items in the purchase invoice is automated based on values. However, manual allocation is also possible if adjustments are needed.
Step 12: After verifying the allocated amounts, click the save button to finalize the allocation process.
Managing Landing Costs with Multiple Supplier
"Managing Landing Costs with Multiple Suppliers" involves handling additional expenses from suppliers other than the primary one from whom goods are purchased. This means that a secondary supplier is billing the buyer for extra costs. For instance, if the buyer uses 'Supplier B' for transportation services for goods bought from 'Supplier A', the transportation costs from 'Supplier B' need to be allocated to the purchased items to determine the total cost of acquiring the goods. Let's explore how this process works in Accoxi!
Process Flow
- Create a New Ledger for the Expense
- Go to the Accounts module and select the Ledger option.
- Choose the appropriate Account Group ("Direct Expense" or "Indirect Expense") based on the nature of the expense.
- Enter the Ledger Name for the incurred expense.
- Create a Purchase Invoice for the Goods
- Navigate to the Purchase module and select the Purchase Invoice option.
- Click on the +New Purchase Invoice button to open the purchase creation window.
- Fill in all necessary transaction details related to the supplier from whom the goods were purchased.
- Enter the purchased product and relevant product details in the product/service grid.
- Once all details are entered, click the Save button to proceed with the goods purchase transaction.
- Create a Purchase Invoice for the Expense
- In the Purchase module, select the Purchase Invoice option and click on +New Purchase Invoice.
- Enter the supplier details pertaining to the expense transaction.
- In the product/service grid, select the expense account and enter the amount, including tax% if applicable.
- After entering all details, click Save to proceed with the expense purchase transaction.
- Allocate the Landing Cost to the Goods Purchase
- Go to the view screen of the first purchase invoice (related to the goods purchase).
- Select the ‘Allocate Landing Cost’ option available in the More options of the view screen to open the Landing Cost Details window.
- Click on the ‘Allocate From Another Bill’ section in the Landing Cost Details window to open another popup window.
- In this popup window, select the supplier from whom the expense is incurred from the dropdown.
- Select the purchase invoice number created for the expense transaction.
- In the grid, verify the details related to the expense, including the expense name, quantity, taxable amount, tax amount, and total amount.
- Use the ‘Exclude Tax’ checkbox if the tax amount is not required to be allocated to the product.
- If the invoice contains multiple expenses, they will display in multiple rows; you can remove any unnecessary expense rows using the delete button.
- After verifying all the details, click on the ‘Add to Landing Cost’ button.
- The saved landing cost will display in the Landing Cost Details Window. Click on the Allocate Landing Cost icon near the expense detail to open the Landing Cost Allocation popup window.
- The total amount of the expense will automatically allocate to the products in the purchase invoice based on the proportion of product value. Manual adjustments can be made if needed.
- After verifying the allocation amount, click Save to finalize the allocation process.
- Review the Total Cost Incurred
- The total cost incurred for purchasing the product can be accessed through the Landing Cost Report available under the Report module.
Allocation of Bank Charges as Landing Cost
Sometimes, banks may impose charges when transferring funds to a supplier. In these instances, it is essential to accurately determine the item's total cost and finalize its selling price, by including the bank charges to the item cost. Accoxi addresses this need by assigning the bank charge as a landing cost. Let's go through the step-by-step process of allocating bank charges as a landing cost.
- Create a Purchase Invoice for Goods
- Navigate to the Purchase module and select the Purchase Invoice option.
- Click on +New Purchase Invoice to open the creation window.
- Enter the supplier details and product details in the creation window.
- Save the transaction in credit mode.
- After saving, go to the view screen of the created purchase invoice transaction.
- Make a Payment
- Click on the Make Payment button available in the view screen to open the Supplier Payments screen with prefilled data.
- Enter the amount paid in the respective field.
- Enter the amount of Bank Charge in the provided field.
- Verify the details and click on the Save button to save the payment transaction.
- Allocate the Bank Charges as Landing Costs
- Return to the purchase view screen of the created purchase invoice.
- Select the Allocate Landing Cost option available under the More option in the view screen.
- This opens the Landing Cost Details window, where the bank charges amount is listed.
- Click on the Allocate Landing Cost icon to open the allocation screen.
- The total amount of the bank charge will automatically be allocated to the items in the purchase invoice based on the value proportion.
- After verification, click on the Save button to allocate the amount of bank charge as a landing cost to the items in the invoice.
Managing Customs Duty in Allocation process
If a business operates internationally, customs duties may be imposed on imported goods. To accurately determine the total cost of imported items, it is necessary to include these customs duties. In Accoxi, this is handled by allocating the customs duties to the total value of the imported items. The workflow is as follows:
Workflow
Step 1: Create a Purchase Invoice
- Navigate to the Purchase Module.
- Select the Purchase Invoice option.
- Enter the details for the imported goods.
- Save the purchase transaction.
Step 2: Go to the view page of the created purchase invoice.
Step 3: Create Bill of Entry
Option 1: From Purchase Invoice View Screen
- Select Create Bill of Entry from the More options.
Option 2: From Accounts Module
- Go to the Accounts Module.
- Select Bill of Entry under the VAT Section.
- Click on +New Bill of Entry.
Step 4: Enter Bill of Entry Details
- If creating from the purchase invoice view screen, supplier and item details are auto-filled.
- If creating from the accounts module,
- select the supplier from the dropdown.
- Select the purchase invoice number related to the customs duty payment.
- Item details will auto-fill in the grid.
Step 5: Select the appropriate account in the Paid Through dropdown (Bank Account or Cash Account).
Step 6: In the item grid, select the check box to enable the field for entering the custom duty.
Step 7: Then enter the custom duty on the product.
Step 8: Select the tax percentage from the dropdown if applicable.
Step 9: Select the Check box for Allocate Custom Duty and Additional Charges as Landed Cost.
Step 10: If VAT was paid on the imported goods, Select the Check box VAT has been paid on the import of these goods.
Step 11: Save Bill of Entry: Click on Save to create the new bill of entry.
Step 12: Return to the purchase view of the created purchase invoice.
Step 13: Select Allocate Landing Cost under the More options.
Step 14: Add Bill of Entry to Landing Cost
- In the Landing Cost Details window, select Allocate From Bill of Entry.
- In the popup window, add the bill of entry details to the landing cost.
- Item details, quantity, customs duty value, tax amount, and total amount will display.
- To exclude tax from allocation, Select the Check Box Exclude Tax.
- Unnecessary rows can be removed using the delete button.
Step 15: Click on Add to Landing Cost to show the bill of entry details in the Landing Cost Details window.
Step 16: Allocate Customs Duty to Items
- Click on the Allocate Landing Cost icon in the Landing Cost Details window.
- In the Landing Cost Allocation window, the total customs duty value is allocated to items in proportion to their product value.
- Manual adjustments can be made.
Step 17: Save Landing Cost Allocation
- After verifying, click on Save to add the customs duty value to the cost of the imported items.
Landing Cost Details
The Landing Cost Details window provides a detailed overview of additional expenses linked to the selected purchase invoice. It includes information such as the supplier name associated with the expense, the type of transaction (which can be a purchase invoice, bill of entry, or bank charges), the date of the transaction, the transaction reference number, the total amount, the used amount, and the balance amount.
- Total Amount: The total expense amount.
- Used Amount: The portion of the expense allocated to the product in the purchase invoice.
- Balance Amount: The remaining amount yet to be allocated.
Allocation Process
- Initial Entry: When a landing cost is first recorded, the total amount and the balance amount are the same, with the used amount set to zero.
- Full Allocation: After the entire expense amount has been allocated, the total amount and the used amount will be equal, and the balance amount will be zero.
- Partial Allocation: If only part of the expense is allocated, the used amount will reflect this allocated portion, while the balance amount will show the remaining amount to be allocated.
Each expense row has an icon for allocating expenses to items in the purchase invoice. Additionally, the Landing Cost Details window offers options to:
- Allocate from Another Bill: Create landing cost amounts from a different bill.
- Allocate from Bill of Entry: Create landing cost amounts from a bill of entry.
These options ensure accurate tracking and allocation of all additional expenses, providing a clear financial overview and aiding in the correct accounting of purchase-related costs.
Landing Cost Allocation
Allocation of expense amounts to items in the purchase invoice is managed through the Landing Cost Allocation screen. This window provides details on the total expense amount and the balance amount to be allocated. In the grid section, it displays the products in the purchase invoice, including the item name, quantity, item total, and a field for entering the allocated amount. Multiple items in the purchase invoice are displayed in multiple rows within the window, ensuring clarity and detailed tracking.
Key Features of the Landing Cost Allocation Screen
- Automatic Allocation: Accoxi offers an automatic allocation feature that distributes the landing cost amount to the items in the purchase invoice based on their value proportion.
- Manual Adjustment: Manual allocation is also possible for any necessary adjustments.
Process Overview
- Initial Allocation: When the Landing Cost Allocation screen is opened, the system automatically allocates the total expense amount to the items in the purchase invoice proportionally based on their value. At this point, the balance amount becomes zero.
- Adjustments: If any adjustments are made to the allocated amounts, these changes will be reflected in the balance field. The total allocated amount must not exceed the total expense amount.
- Finalization: After verifying the allocated amounts, the allocation process can be finalized by clicking the save button.
Viewing Allocations
After saving, the total cost incurred on the purchase, which includes both the item total and additional expenses, can be reviewed in the landing cost report available under the reports module.
Overview to Landing Cost Search Screen
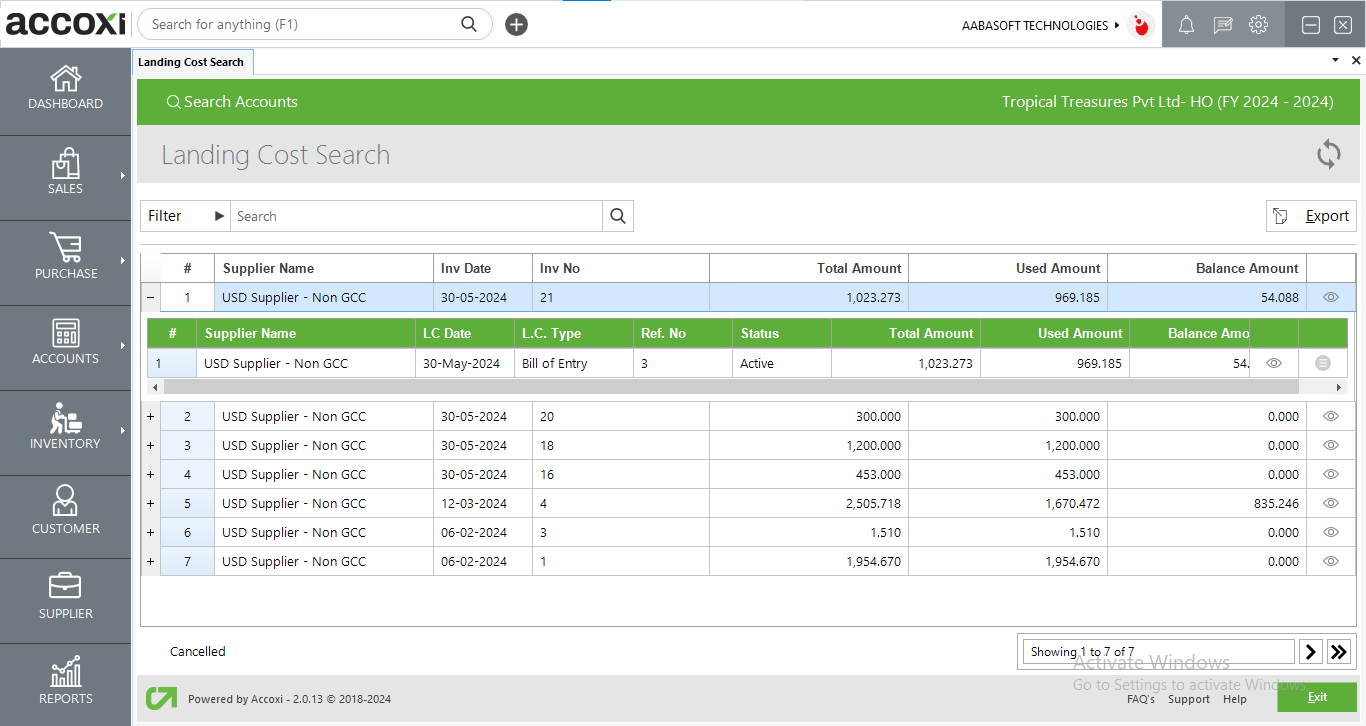
The Landing Cost Search screen in the Accounts module provides an efficient way to manage and review landing cost details associated with purchase invoices. Here's a breakdown of its features and functionalities:
- Overview of Details: The search screen displays a list of created landing cost records. Each record includes the following information:
- Supplier Name: The name of the supplier from whom items were purchased.
- Purchased Date: The date on which the purchase was made.
- Invoice No: The invoice number associated with the purchase.
- Total Amount: The total landing cost amount created against the purchase invoice.
- Used Amount: The amount of the landing cost that has already been allocated to items in the purchase invoice.
- Balance Amount: The remaining landing cost amount that is yet to be allocated to the items.
- Transaction Details: The search screen also displays the details of transactions created as landing costs, providing a comprehensive view of all related activities.
- Features:
- Allocate Pending Landing Cost: This feature allows users to allocate the remaining balance of the landing cost to the items in the purchase invoice.
- Cancel Allocation Process: Users can cancel the allocation process if needed.
- View Icon: Each landing cost record includes a view icon that, when clicked, directs the user to the created transaction view page. This page provides detailed information about the specific transaction, allowing for in-depth review and verification.
- Filtering Options: Users can filter the landing cost search list based on various criteria:
- Supplier Name
- Invoice No
- Status
- Date Range
- Export Functionality: The search list can be exported to an Excel format, allowing for easy sharing and further analysis.
By utilizing these features, users can effectively manage landing costs, ensuring accurate allocation and tracking of expenses related to purchases.